Overview
The Customer List in Cornerstone gives you control over which columns are displayed and in what order. This article explains how to open the Column Selector, choose which columns to show or hide, and rearrange their order to suit your workflow — so the information most relevant to you is always front and centre.
Opening the Customer List
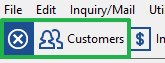
To get started, open the Customer List from the main toolbar by clicking the Customers button.
Opening the Column Selector
You can open the Column Selector in one of two ways from within the Customer List:
- Right-click any column header to reveal the context menu, then click Columns…
- Alternatively, select Hide Column from the same context menu to immediately remove that column from view without opening the Column Selector.

⚠️ IMPORTANT
Images above and below both show the same right-click context menu on the Customer List column header. Right-clicking any column header will display the Columns… and Hide Column options regardless of which column you click.

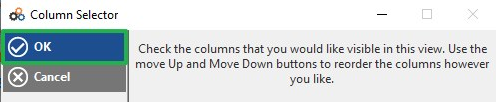
When the Column Selector opens, you will see a brief instruction at the top of the dialog: "Check the columns that you would like visible in this view. Use the Move Up and Move Down buttons to reorder the columns however you like."
Choosing Which Columns to Display
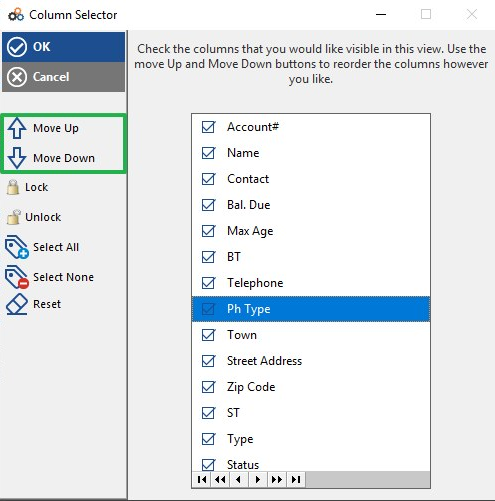
Inside the Column Selector, a scrollable list displays all available columns. Each column has a checkbox next to its name.
- Check the box next to a column name to make it visible in the Customer List.
- Uncheck the box next to a column name to hide it from the Customer List.
- Use the Select All button in the left panel to check all columns at once.
- Use the Select None button to uncheck all columns at once.
- Use the Reset button to restore the default column configuration.
Available columns include: Account#, Name, Contact, Bal. Due, Max Age, BT, Telephone, Ph Type, Town, Street Address, Zip Code, ST, Type, Status, and more.
Reordering Columns
You can change the left-to-right display order of columns in the Customer List using the Move Up and Move Down buttons in the Column Selector.
- Click a column name in the list to select it (it will highlight in blue).
- Click Move Up to shift that column one position to the left in the Customer List view.
- Click Move Down to shift that column one position to the right in the Customer List view.
- Repeat as needed until the columns are in your preferred order.
Additionally, the Lock and Unlock buttons allow you to lock a column in a fixed position so it does not scroll with the rest of the list.

Applying Your Changes
Once you are satisfied with your column selections and order:
- Click OK to save your changes and close the Column Selector. The Customer List will immediately refresh to reflect your new column configuration.
- Click Cancel to discard any changes and return to the Customer List with no modifications.
After applying, the Customer List will display your chosen columns — for example, adding Zip Code, Town, Central Acct #, Central#2, and Central#3 columns alongside the standard tabs.

Need Additional Help?
Our Customer Success team is here to assist you.
Phone: 847-405-9517 x1
Email: customer.success@alarmbills.com
Copyright © 1999–2026 Cornerstone Billing Solutions. All rights reserved.
Was this article helpful?
That’s Great!
Thank you for your feedback
Sorry! We couldn't be helpful
Thank you for your feedback
Feedback sent
We appreciate your effort and will try to fix the article