Overview
This guide explains how Cornerstone integrates with AvantGuard (AVG) to allow dealers to set up accounts in one location and either Push or Pull account information — including Customer, Site, Contact List, and Zones. It covers how to get started, how data flows between the two systems, which fields are communicated, and step-by-step instructions for creating and managing accounts, contacts, and zone lists.
This article is intended for alarm dealers who use AvantGuard as their central monitoring station and manage billing and subscriber records in Cornerstone.
Before You Begin
Before Cornerstone can integrate with AvantGuard, you will need to complete a few preparatory steps. Call Cornerstone and we can help set up the connection with you and AvantGuard.
- Verify your Central Station numbers. Make sure that you have your Central Station numbers in your accounts. These numbers must include the dealer code before the assigned central account number, preferably without hyphens. This is the linking field between Cornerstone and AvantGuard. If it needs to be tweaked, Cornerstone can help.
- Provide your AvantGuard Dealer Site Account number. Give Cornerstone your AvantGuard Dealer Site Account number and your representative's email address and Cornerstone will set up the handshake.
- Determine the protocol for edits. Decide whether edits need to flow only through your office/Cornerstone, or whether subscribers can call AvantGuard directly to make changes. Cornerstone has built the ability to Push (new accounts or edits to accounts) and Pull data (one-time Pull for new accounts set up by AvantGuard, or existing accounts in Cornerstone). It can also Push fields edited in Cornerstone to AvantGuard, or Pull/Synchronize updated data from AvantGuard.
⚠️ IMPORTANT — Recommended Workflow
We recommend that you continue to create accounts at AvantGuard and then Pull the account information — including Customer, Site, Contact List, and Zones — into Cornerstone. We also recommend you treat Cornerstone as the Main Record Keeper for the Customer Site, Contacts, and Zones. Edits to any of the AvantGuard required fields in Cornerstone will immediately Push the new field values to AvantGuard.
If you allow edits to be made at AvantGuard, those changes do not automatically communicate back to Cornerstone. However, you can set the protocol for AvantGuard to notify you of changes so that you can use the Get from Central Station button to Pull information and update the record in Cornerstone. For example, if a subscriber calls AvantGuard with a new codeword or a contact update, they simply need to let you know which field(s) changed so you can synchronize the records with Cornerstone.
⚠️ IMPORTANT — Life Safety
If AvantGuard changes a Code Word and you do not update Cornerstone, AvantGuard will have the new code word and Cornerstone will not. This errs on the side of life safety, where the correct record is with AvantGuard.
Things That Must Be Done Directly in / with AvantGuard
Some actions cannot be completed through the Cornerstone–AvantGuard integration and must be handled directly with AvantGuard:
- Closing accounts / taking them offline at AvantGuard. Closing an account in Cornerstone will only stop the recurring billing. Cancellations must be handled directly with AvantGuard in whatever is the established protocol. There is a Central Station Notice function in Cornerstone where you can email your request and have it recorded in the Correspondence log.
- Special protocol instructions. Some accounts may require special instructions, and those instructions need to be handled/recorded directly with AvantGuard.
- Review of or changes to the Responding Authority. When Cornerstone pushes the subscriber's site address (street, city, and Zip code), AvantGuard produces GPS coordinates and the responding authority is automatically selected and stored at AvantGuard. If a valid GPS coordinate is not returned, you will get a warning that you need to review it with AvantGuard.
Setup and Data Fields
Cornerstone needs to enter your Dealer/Site Account Number in two places: the System Header and the Central Station List. User Defined fields 18 and 20 will also be set to AvantGuard Device and Dispatch Type respectively. Cornerstone can accommodate multiple Central Station prefix numbers.
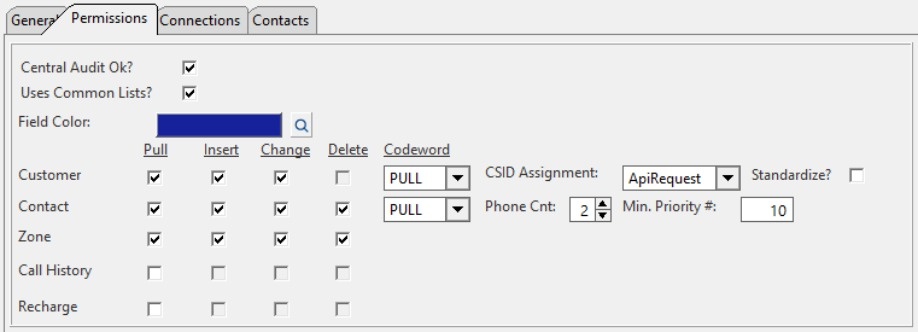
The Permissions tab of the Central Station setup controls which data actions are enabled for Customer, Contact, and Zone records (Pull, Insert, Change, Delete, Codeword) as well as CSID Assignment and Phone Count settings:
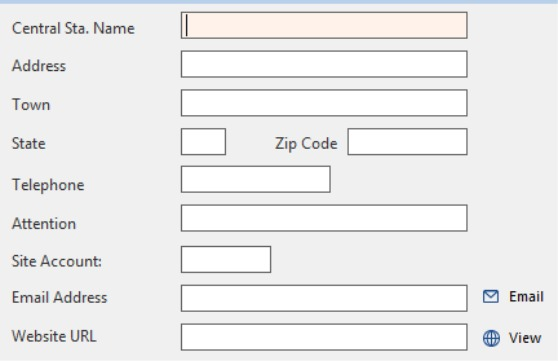
The Central Station List entry includes fields for the station name, address, site account number, email, and website:
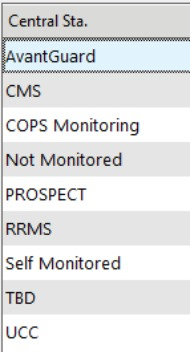
When selecting the Central Station for an account, choose AvantGuard from the Central Sta. dropdown list:
⚠️ IMPORTANT
If you have accounts that are monitored elsewhere or not at all, choose a Central Station option on the list other than AvantGuard so data changes to that account do not try to communicate with AvantGuard.
Creating an Account in Cornerstone
Accounts can be created in Cornerstone and pushed to AvantGuard, or — if AvantGuard created the account — you can download the customer record from AvantGuard. We highly recommend Option A, where accounts continue to get created in AvantGuard and the information is then downloaded to Cornerstone.
Option A — AvantGuard Created the Account (Recommended)
This is the easiest option and does not change your current processes.
- Enter the Cornerstone Account number you want (if it is not auto-generated).
- Enter the Central Account# — the number assigned to that customer when AvantGuard created the account (the CSID that AVG provided to you). Fill this in the Central Acct # field.
- Click the Download Customer button to pull the data from AvantGuard into Cornerstone. You will also be prompted to download the Contacts and Zones.
Option B — Creating the Account in Cornerstone to Push to AvantGuard
- Enter a Cornerstone Account number.
- Leave the Central Acct # blank. Do not enter anything in this field.
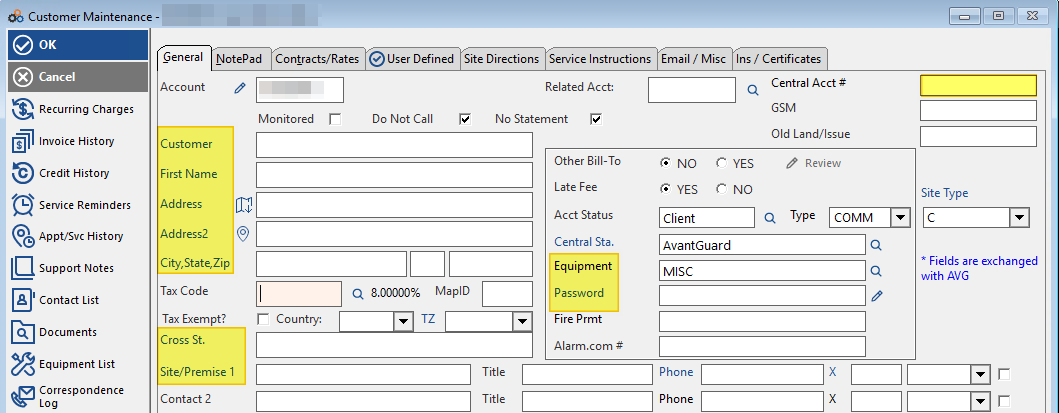
- Enter all Customer data in the required and optional fields (see the Data Fields section below).
- Click OK. This communicates with AvantGuard to assign the next available Central ID number, records it in Cornerstone, and creates the account in AvantGuard.
⚠️ IMPORTANT
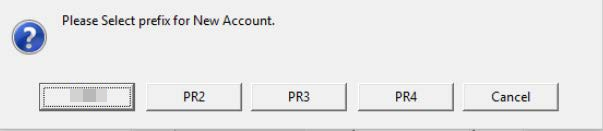
You will need to assign a Cornerstone account number before getting the AvantGuard number — you can number accounts sequentially or use an alternative method. If you have been assigned more than one prefix for your central station numbers by AvantGuard, you will be prompted to select the appropriate prefix when creating a new account. These additional central station number prefixes are device types and will require the appropriate device selection.
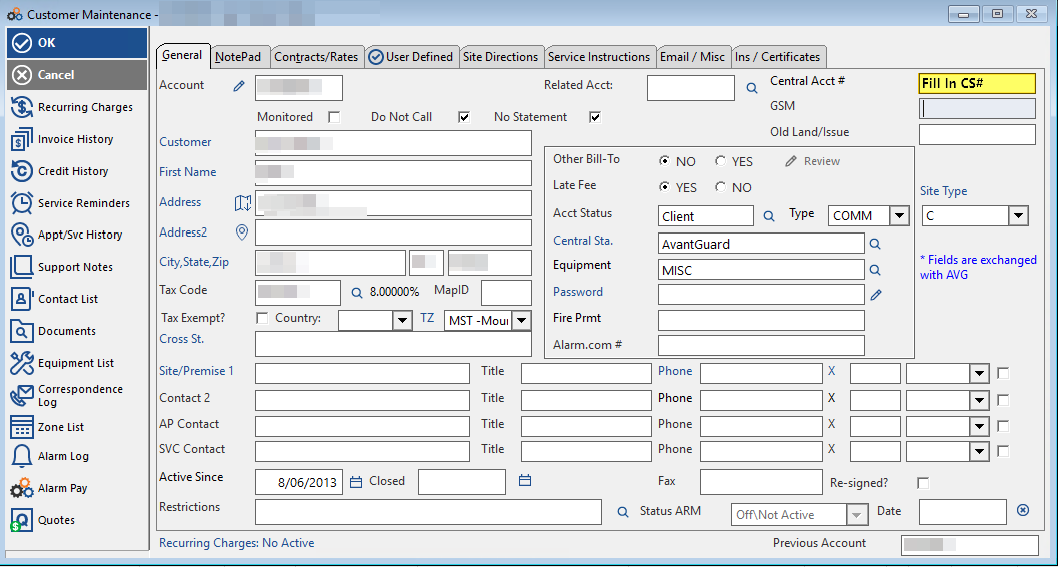
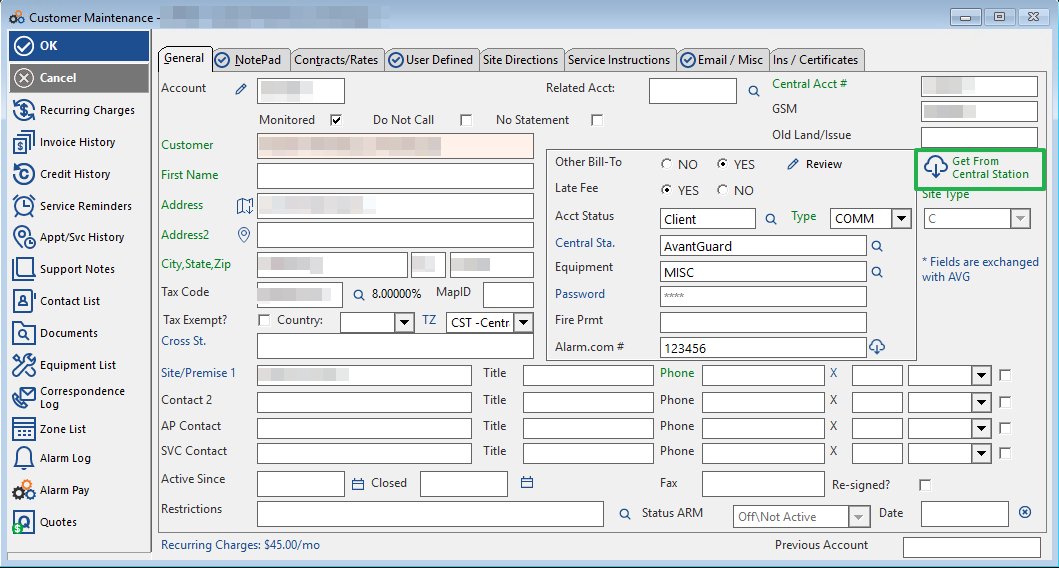
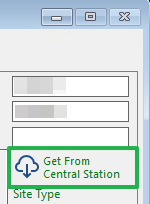
The Customer File Maintenance screen — General tab — is where you enter all customer data before submitting to AvantGuard. After customer information is downloaded or submitted, a Get From Central Station button becomes available so you can Pull in information that was updated at AvantGuard (if you allow edits to be made directly there):
A Note about Multiple Prefixes
The communication link between Cornerstone and AvantGuard is the number in the 1st Central Station # Field.
If you have multiple prefixes for your AvantGuard Central Station number, that means you have been assigned different numbers based on the devices. While the Site info and the Contacts are shared between devices, the devices may have different Zones. Cornerstone's system only records one set of Zones per site. If you need to keep different zones for each device for a subscriber in Cornerstone, you will need to have a customer record with the communicating device/AvantGuard # in the 1st Central Station Number field for each device. If you do not need the Zones for a second or third central station number, they can be stored in the 2nd and 3rd Central Account# fields.
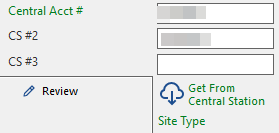
Most dealers create two separate accounts in Cornerstone when the same customer has both Burglary and Fire. This allows for recording of the different equipment installed, service tickets, and reminders needed for the different services. Billing can always be consolidated in one account.
⚠️ IMPORTANT
For accounts you already have in Cornerstone, simply open the account and click Download Customer and you can pull the information from AvantGuard — site, Contacts, and Zones (attached to the Central Acct# 1).
Data Fields — Customer Record
The following fields are communicated to AvantGuard when you Push or Pull account data. If you are pushing to AvantGuard, fill in the fields in Cornerstone. If the data is already in AvantGuard but not in Cornerstone, use Download Customer or Get from Central Station to pull it in.
| Field | Instructions |
|---|---|
| Account | Your 2 letters will appear and you enter in the remaining digits. |
| Central Acct# | Leave Blank — the AvantGuard ID number is assigned by AvantGuard (for Option B). For Option A, enter the CSID that AVG provided to you. |
| Customer | Company name or the last name. |
| First Name | First name if a residential customer. |
| Address | Address line 1 is the street address. |
| City, State | Fill in. |
| Zip | Enter the Zip Code. Allows for USPS address validation for the mailing address. |
| TaxCty | Select the list box and choose the city. This does not get submitted to AvantGuard but is needed for billing. You will need to enter this if you download from AvantGuard as they do not ask for the Taxing County. |
| TZ | The Time Zone should automatically fill in from the Zip Code and is communicated to AvantGuard. |
| Type | Select RES or COMM — sends R or C to Site Type. |
| Equipment | You can enter the panel type if you wish. The AvantGuard required Device type selection is made later on the User Defined tab. |
| Code Word | Enter the Password. If none is required, enter NCR so the operators know. Leave blank if there are individual Pass Codes for individual Contacts. |
| Site/Premise Contact 1 | Enter a name (Recommended, not required). |
| Phone | Premise phone number (Recommended, not required). |
User Defined Tab — Device and Dispatch Type
Click on the User Defined tab to enter the following fields:
- AvantGuard Device Type — Choose type from the dropdown list (Required). If unknown, enter MISC.
- Dispatch Type — Choose type from the dropdown list. This is Required for 2 Way Devices and recommended for all other devices. The Device number is assigned Event Codes and Event Types at AVG.
Click the lookup icon for the validated options. If you know your option is on the list, you can type it in to save time.
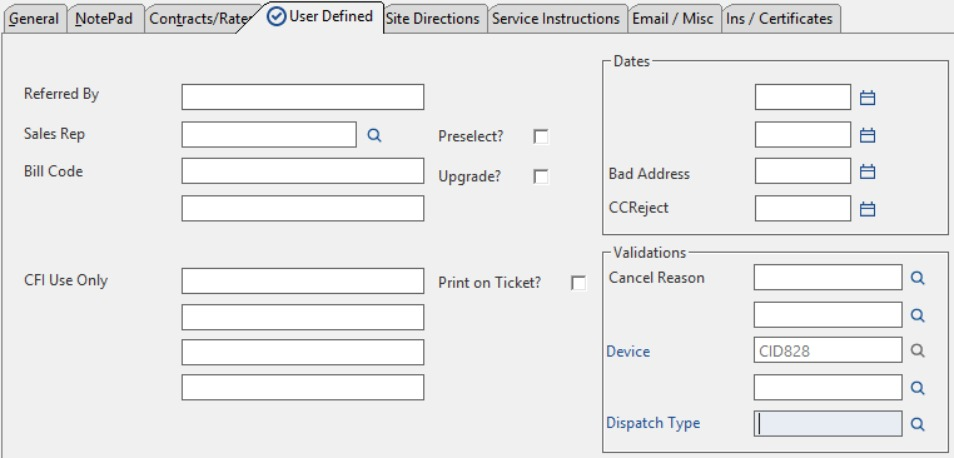
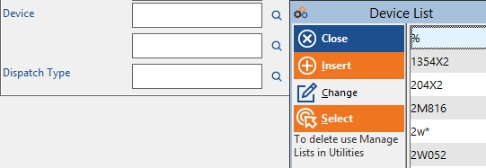
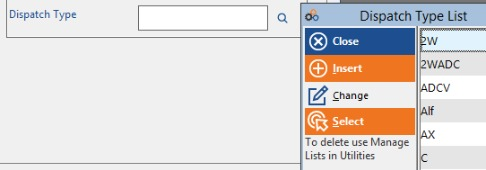
⚠️ IMPORTANT
Once the Device is established (either by selection and push or by downloading it), changes to the Device must be done directly at the central station.
Address Validation
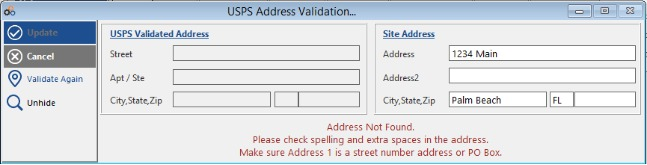
When you click OK, you will be prompted to validate the address as a USPS recognizable mailing address. If it is recognized, the Zip+4 will be available. Select Update to update the Cornerstone entry. The location pin icon will also call the USPS API lookup for the mailing address.
Contacts
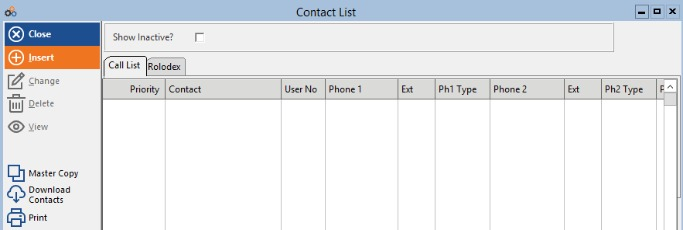
The customer record has a space for the premise contact name and a phone number. The Contacts list provides the call list for the account.
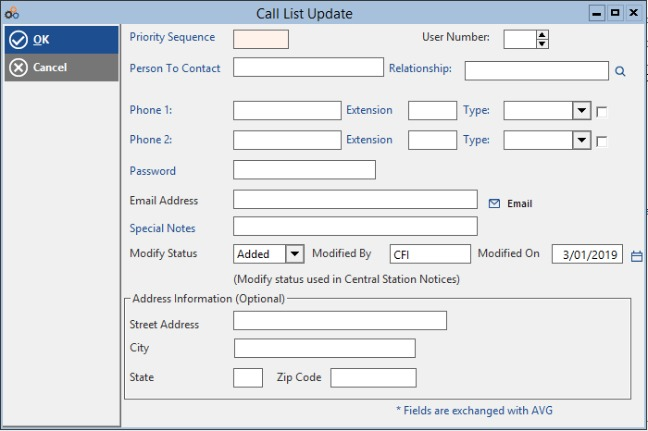
If you are entering data in Cornerstone to push to AvantGuard, you will need to enter the required data (clicking OK will submit it to AvantGuard). Download Contacts will pull in the Contact information if it already exists in AvantGuard and is not in Cornerstone. If contacts have been either downloaded or submitted to AvantGuard, a Get From Central Station button will be available to pull updates that were made directly with AvantGuard.
Contact Required Fields
| Field | Instructions |
|---|---|
| Priority Sequence | Enter the Priority Sequence for the contacts. Additional Contacts need to be numbered in increasing values. |
| Person to Contact | Enter First and Last Name. Anything before the first space will be treated as the first name. Anything after the space will be considered a Last name. |
| Phone 1 | Fills in the first phone number field in AvantGuard for the Contact. |
| Phone 2 | Fills in the second phone number field in AvantGuard for the Contact. |
If you allow contacts to be changed at AvantGuard, then once you receive notification of changes, the Get from Central Station button will pull from AvantGuard the available contacts and update the information in Cornerstone. If a contact was deleted at AvantGuard, you will be notified of the deletion and instructed to delete that contact in Cornerstone.
Zone Lists
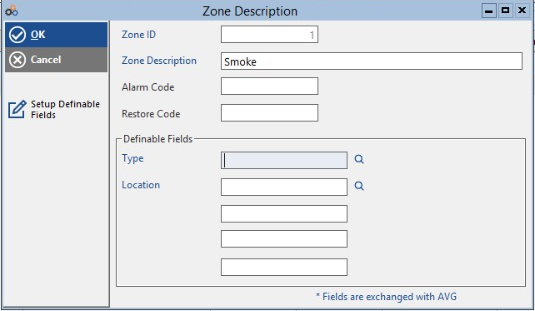
Zone Lists are device specific, and the get data links to the Central Station number in the 1st field. If you have multiple devices installed for the same site, they share the site and contact information. If you need to record different Zone information in Cornerstone, you will need to create a second account so that the second device is recorded in an account in the 1st Central Station field.
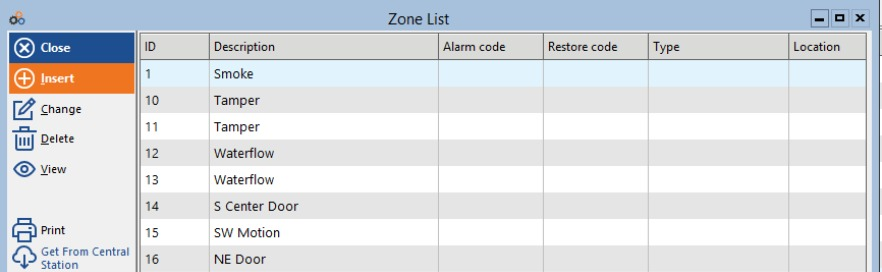
If you are pushing information to AvantGuard, enter the data. If the account was originally created by AvantGuard, Get From Central Station will pull the zones from AvantGuard (if the data is already there and does not exist in Cornerstone). Once downloaded, the Get from Central Station button is available should a change in Zones be made directly with AvantGuard.
Zone Required Fields
| Field | Instructions |
|---|---|
| Zone ID | Enter the Zone Number in the Zone ID. |
| Zone Description | Enter the Zone Description. |
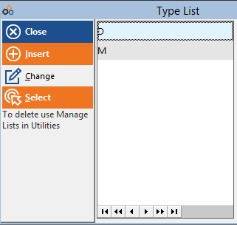
| Service Type | Use the list box to select the Service Type. |
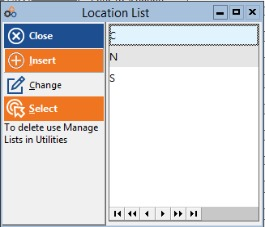
| Location | Use the list box to select the Location. |
Quick Reference — Actions That Must Be Done Directly with AvantGuard
As a reminder, the following must always be handled directly in/with AvantGuard — they cannot be completed through the Cornerstone integration alone:
- Closing accounts / taking them offline. Closing an account in Cornerstone will only stop the recurring billing. Cancellations must be handled directly with AvantGuard. Use the Central Station Notice function in Cornerstone to email your request and have it recorded in the Correspondence log.
- Special protocol instructions. Some accounts may require special instructions that need to be handled/recorded directly with AvantGuard.
- Review of or changes to the Responding Authority. When Cornerstone pushes the subscriber's site address (street, city, and Zip code), AvantGuard produces GPS coordinates and the responding authority is automatically selected and stored. If a valid GPS coordinate is not returned, you will get a warning that you need to review it with AvantGuard.
Need Additional Help?
Our Customer Success team is here to assist you.
Phone: 847-405-9517
Email: customer.success@alarmbills.com
Copyright © 1999–2026 Cornerstone Billing Solutions. All rights reserved.
Was this article helpful?
That’s Great!
Thank you for your feedback
Sorry! We couldn't be helpful
Thank you for your feedback
Feedback sent
We appreciate your effort and will try to fix the article