Overview
This article walks you through adding a new Recurring Charge to a customer account in Cornerstone. Recurring charges are the ongoing fees billed to your customers on a scheduled basis — such as monthly monitoring fees. Follow the steps below to open the Recurring Charges screen, enter all required charge details, configure billing options, and save the record.
Step 1 — Open the Recurring Charges Screen
From the customer's record in Customer Maintenance, locate the left-hand navigation panel and click Recurring Charges.

The Recurring Charges list screen will open, displaying any existing charges for the account. The running Monthly total is shown at the top. To add a new charge, click the Insert button (highlighted in orange).

The Recurring Charge detail screen will open for account entry. The Account number is pre-populated from the customer record.
Step 2 — Enter the Charge Code
In the Code field, enter the billing code for the recurring charge (for example, BURG for a burglary monitoring charge). If you do not know the exact code, click the magnifying glass icon next to the Code field to search for and select the appropriate charge code from the lookup.

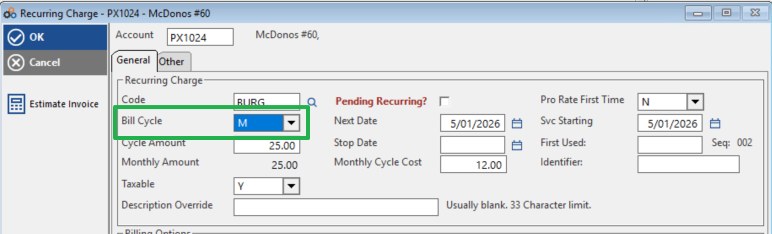
Step 3 — Set the Bill Cycle
Use the Bill Cycle dropdown to select how frequently the charge will be billed. For example, select M for Monthly. This controls the billing frequency for the recurring charge.
Step 4 — Review Recurring Charge Fields
With the code and cycle entered, review and complete the remaining fields in the Recurring Charge section. The table below describes each field.
| Field | Description |
|---|---|
| Code | The billing charge code (e.g., BURG). Use the magnifying glass to look up available codes. |
| Bill Cycle | Billing frequency — e.g., M for Monthly. |
| Cycle Amount | The amount charged per billing cycle. |
| Monthly Amount | The calculated monthly equivalent of the charge. |
| Taxable | Indicates whether the charge is subject to tax (Y/N). |
| Description Override | Optional. Overrides the default charge description on the invoice. Usually left blank. 33-character limit. |
| Pending Recurring? | Checkbox indicating the charge is pending and not yet active. |
| Next Date | The next scheduled billing date for this charge. |
| Stop Date | The date on which the recurring charge should stop. Leave blank for an ongoing charge. |
| Monthly Cycle Cost | The monthly cost of the cycle as calculated by the system. |
| Pro Rate First Time | Determines whether the first billing period is prorated. Set to N if no proration is required. |
| Svc Starting | The date service begins for this charge. |
| First Used | The date this charge was first used on the account. |
| Seq | The system-assigned sequence number for this recurring charge line. |
| Identifier | An optional identifier field for the charge. |
Step 5 — Set the Next Date
Enter the Next Date — the date on which this recurring charge will next be billed. You can type the date directly or use the calendar icon to select it. This field determines when the charge first appears on an invoice.

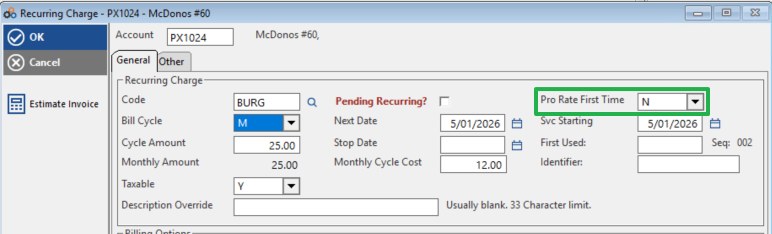
Step 6 — Configure the Pro Rate First Time Setting
Review the Pro Rate First Time dropdown in the upper-right area of the General tab. This controls whether the first billing period is prorated. If proration is not required, ensure this is set to N. The Svc Starting date alongside this field indicates when the service period begins.
⚠️ IMPORTANT
If Pro Rate First Time is set to Y, the system will calculate a prorated amount for the first billing cycle based on the Svc Starting date. Verify this setting carefully before saving to avoid billing errors.
Step 7 — Configure Billing Options
Scroll down to the Billing Options section of the General tab. Complete the fields as described below.
Identity On Invoice
The Identity On Invoice field controls how the account is identified on the printed invoice. Use the dropdown to select the appropriate option — for example, Name will display the customer's name on the invoice.

Master Account
If this charge should roll up to a master account for consolidated billing, enter the master account number in the Master Account field. Use the magnifying glass to look up the correct account. In the example shown, the master account is PX1022.

Post to Master
The Post to Master field determines whether this recurring charge is posted to the master account. Set this to YES if the charge should be consolidated and billed at the master account level.

The table below summarises all fields in the Billing Options section.
| Field | Description |
|---|---|
| Billing Method | The method used to deliver the invoice — e.g., Printer. |
| Billing Method (Prev) | The previously used billing method, retained for reference. |
| Post On | When the charge is posted — e.g., Post on 1st. |
| Identity On Invoice | How the account is identified on the invoice — e.g., Name. |
| Post Payment To Invoice | Whether payments are posted directly to the invoice — e.g., YES. |
| Master Account | The master account number if this charge rolls up to a consolidated billing account. |
| Post to Master | Whether the charge is posted to the master account — YES or NO. |
| Email Copy | Whether an email copy of the invoice is sent. Defaults to Email Copy: None if not configured. |
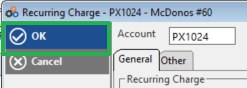
Step 8 — Save the Recurring Charge
Once all fields have been completed, click the OK button in the upper-left corner of the Recurring Charge screen to save the record. The new charge will now appear in the customer's Recurring Charges list and will be included in their next billing cycle as scheduled.
⚠️ IMPORTANT
If you need to review the invoice before saving, use the Estimate Invoice button on the left panel to preview how the charge will appear on the customer's next invoice. Click Cancel at any time to discard your changes without saving.
Need Additional Help?
Our Customer Success team is here to assist you.
Phone: 847-405-9517 x1
Email: customer.success@alarmbills.com
Copyright © 1999–2026 Cornerstone Billing Solutions. All rights reserved.
Was this article helpful?
That’s Great!
Thank you for your feedback
Sorry! We couldn't be helpful
Thank you for your feedback
Feedback sent
We appreciate your effort and will try to fix the article